


by Rebecca Freemantle
March 12, 2013 – Delcam Plc is an internationally recognised software development company, who recently presented at the World Money Fair in Berlin to demonstrate the latest 3D modelling capabilities available to the industry. Part of their demonstration covered the creation of a peacock coin created in their advanced artistic CADCAM software, ArtCAM Pro 2012, which has just been released.
ArtCAM Pro includes number of vector drawing and advanced 3D modelling techniques, which make a significant leap in the way that coins are designed. Because of this, Delcam wanted to really showcase what could be achieved with the new software. Below you can see the step-by-step approach that was taken to create the ArtCAM coin.
Creating the peacock
There are multiple approaches to creating a design in ArtCAM so that users can find a way that suits them. For the design, Delcam decided to create the peacock as a number of different 3D models which were merged with one another to create one complete relief. Individual parts were modelled for the body, the head, the feet, the back feathers, and a feather, which was used to construct the main plumage. These were each saved in ArtCAM’s ‘Clipart Library’. This library has over 500 pieces of free ‘Relief Clipart’ that can be incorporated into customer’s designs. It can also be expanded to include a designer’s own pieces. The advantage of this is that these pieces of ‘Relief Clipart’ can be saved in a high resolution and then scaled down for other design projects.
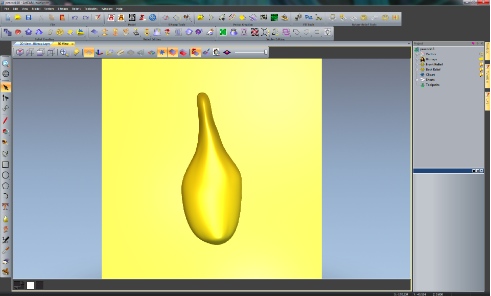
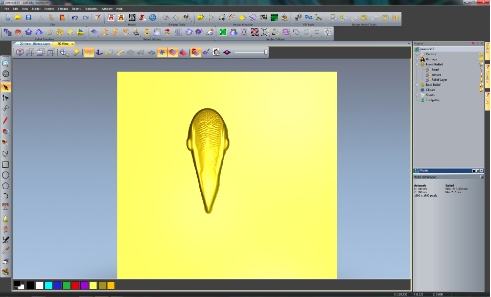
The first part to be modelled was the body. Using ‘Create Polyline’, one of ArtCAM’s many vector drawing tools, two vectors were drawn to represent the sides of the peacock’s body. With this tool the user can alternate between straight and smooth polylines whilst drawing or add to existing vectors. For this, the ‘smooth polylines’ option was selected. Two more vectors were then drawn, one to make the 3D shape of the neck and the other for the base. Using the ‘Two Rail Sweep’ tool, a sweep shape was created using these vectors to represent the edges and cross sections of the peacock body.
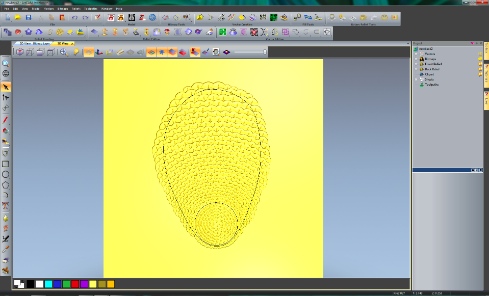
Next feathers were added onto the peacock’s body using ArtCAM’s introductory 3D modelling tool, the ‘Shape Editor’ and the new patent pending ‘Texture Flow’ tool. Unlike other texture creation tools within ArtCAM Pro, ‘Texture Flow’ has been designed specifically to make organic 2D and 3D shapes and patterns such as hair, fur, scales and feathers.
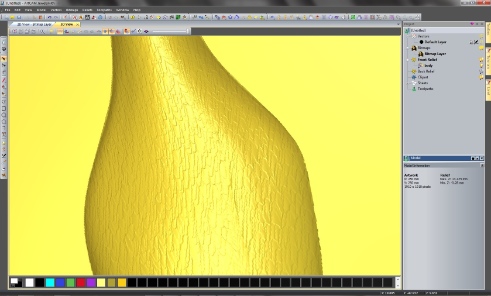
To create the feathers, a small feather outline was drawn and using the ‘Shape Editor’ height and shape were added to it. This tool allows the designer to specify a shape, as well as its height, angle and how this interacts with the rest of the relief. We then used ArtCAM’s ‘Smooth’ sculpting tool on the bottom of the feather so it would blend nicely once the design was repeated across the body.
Afterwards, a vector was drawn, which would determine the direction that this feather would flow along the body using the ‘Texture Flow’ tool. To create natural looking feathers, the scale of the feather was altered according to its position along the vector, thus making them smaller around the peacock’s neck and larger towards to base. The feathers were also allowed to overlap the edges of the 2D drawing. For other designs however, users can also opt to delete or trim areas within a set boundary. To find the best texture for the body, ArtCAM’s patented relief layering system was utilised. With a similar principle to PhotoShop, this system allows users to create designs on a number of layers, which can be turned on and off, whilst designing. Once happy with the relief artwork, the peacock body was sent directly into ArtCAM’s ‘Clipart Library’.
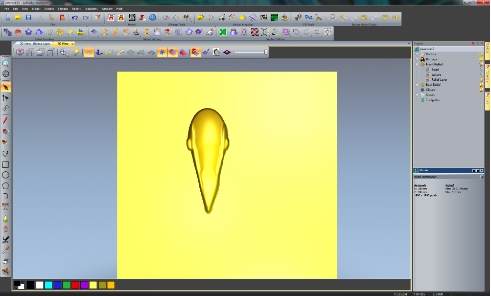
Moving onto the head, a combination of the vector drawing tools and the ‘Shape Editor’ were used.
Feathers for the top of the head were created, again using the ArtCAM 2012’s ‘Texture Flow’ tool, and then smoothed using a sculpting tool to soften the look of the face.
The feet of the peacock were also quickly modelled using the ‘Shape Editor’ and ArtCAM’s sculpting tools. ArtCAM Pro has a multitude of sculpting tools whose width and shape can be altered whilst adding material, carving, smudging, smoothing or removing it where necessary. Delcam were able to continually change the pressure, shape and size of their sculpting tool whilst working. An alternative would have been to use a Wacom tablet to replicate the effect/feel that someone gets from traditional sculpting.
For the back feathers, Delcam began by creating a 3D shape for a single feather, which was then filled inside a vector shape using the ‘Texture Flow’ tool. To create the best result Delcam tried different distances and scales for the feathers. To decide on the best version, different designs were saved on separate relief layers.
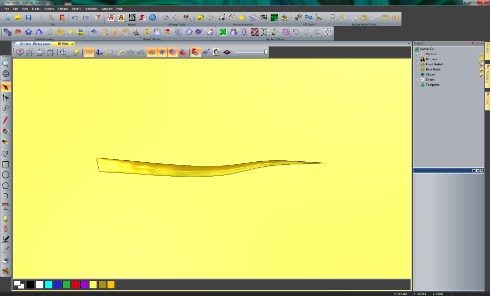
To model the bird’s plumage, Delcam started with a single feather. To do this a bitmap image of a feather was imported into ArtCAM. (ArtCAM can import most common vector and bitmap image formats, including: pdf, bmp, jpeg, tiff, gif, eps and also gives full support to dwg, ai and dxf files retaining all the original information.)

Using the bitmap as a guide, the vector drawing tools were used to create the spine of the feather and the shape of one of the feather’s strands. Using the ‘Shape Editor’ a domed shape was added to the vector. Then using ArtCAM’s ‘Node Editing’ tools altered it to add a more fluid shape to the design. The base of the feather was smoothed out, so that it would not stand proud of the feather spine when added to it.
To create the rest of the feather one of the new key developments of ArtCAM 2012; a modelling process called ‘Free Relief Modelling’ was used. This process allows users to open multiple pieces of clipart, resize them and move them around before they are pasted down, the ‘Clipart’ is “free” to move around and manipulate.
Making a copy of the strand it was placed several times along the length of the feathers spine using the ‘Block, Copy, Rotate’ feature. For the eye of the feather, Delcam simply created the shape with the vector drawing tools and then used the ‘Shape Editor’ again to add height to it.

This feather was then added to ArtCAM’s ‘Relief Clipart’ Library. Opening up a new ArtCAM Model, Delcam began creating the span of feathers. Thanks to the ‘Free Relief Modelling’ process this was quickly achieved. Bringing in the feather from the ‘Clipart Library’ they shrunk it down to the required size and then copied and pasted it around a central point. This was then repeated for the remaining feather layers until the team were happy with the results. They then pasted down the feathers onto the relief layer. If a mistake was made at any time, thanks to the ‘Free Relief Modelling’ process they could simply draw a vector around the feather or area that they were not happy with, use the ‘Cookie Cutter’ tool to “free up the relief” and then move, rotate, rescale and delete as and when required. As with all the other models this was saved into the ‘Clipart Library’.
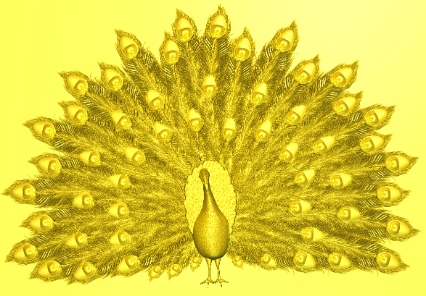
This only left ArtCAM designers to assemble the final peacock design. All the previously created ‘Clipart’ was dragged in from the ‘Clipart Library’ into one ArtCAM model. With ArtCAM 2012’s ‘Free Relief Modelling’ process they could all be kept open at the same time to ensure that all the pieces were the correct size and fitted together properly before they were pasted down onto the relief. As with all other models, this was then saved into the ‘Clipart Library’ for future use.
Creating the ArtCAM Coin – The Obverse
To create the Delcam coin design, the artist began by creating a new ArtCAM model with a resolution of 4000 x 4000 pixels. They then started drawing their 2D design with a circle which would be the outer edge of the coin. To ensure accuracy, ArtCAM allows users to enter the radius or the diameter of the circle that they wish to create. This vector was then offset multiple times to create the other circular vectors. The ‘Shape Editor’ was then used to add the domed shape to some of these vectors.
Before moving onto the text, a new vector layer was made. As with the ‘Bitmap’ and ‘Relief Layers’ available in ArtCAM; this allows users to experiment with complex designs and make alterations, with ease. For the text Delcam used ArtCAM’s ‘Create Vector Text’ tool. This can use any TrueType or OpenType font and is also supplied with “single-stroke” engraving fonts for faster more efficient engraving times.
So that the text would sit neatly in between the circles, the text was wrapped around the curve of one of them. The ‘Wrap Text Around A Curve’ tool gives the user the opportunity to select the distance and position in relation to the selected curve, in addition to the spacing of the letters. These changes can be seen instantly, reducing the time required modifying the design.
Once successfully positioned, using a separate relief layer, the ‘Contour Blend’ tool was used to add shape to the text. This tool can take any unique 2D shape or letter and create perfectly smooth domed or centreline ridged shapes.
To create the dome patterned edging on the obverse side of the coin, a vector circle was drawn and copied and rotated around the design. Selecting all of these, the ‘Shape Editor’ converted them into domed shapes.
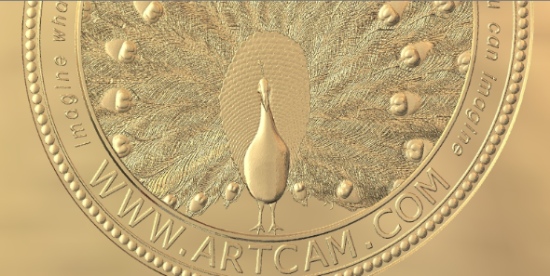
To complete the design, the peacock was brought in from the ‘Clipart Library’, scaled to size and then pasted down onto the model. To stop the overlap over our circular edge, the nearest vector was selected and then, using the ‘Shape Editor’ once again, it levelled all of the peacock design where is passed beyond the selected vector.
Creating the ArtCAM Coin – The Reverse
For the reverse side of the coin, the designer began modelling on the ‘Back Relief’. In the ArtCAM project panel, designers can sculpt and model on both the front and back of a 3D design.
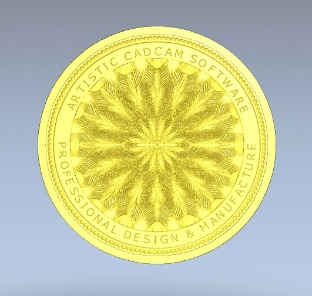
Copying the domed reliefs and circular edging from the obverse side of the coin, they simply altered the ‘Vector Text’ and used the ‘Contour Blend’ tool to give it height. Bringing in the feather clipart once again, this was copied and rotated around the central point of coin using ArtCAM’s ‘Block Copy Paste’ feature. This completed the design aspect of the ArtCAM Coin.
Preparing The Coin Design For Manufacture
With many 3D modelling packages, a great challenge is to find a machining package that will be able to replicate the same exact level of detail that can be created in the 3D design. Delcam’s ArtCAM allows you to not only make high resolution designs but to also RP, laser or CNC the designs. In the case of the ArtCAM coin, Delcam wanted to CNC machine the coin dies, which were then used to punch the ArtCAM coin.
Soliciting the help from specialist engravers, Howard Bros Engravers Ltd, Delcam sent their relief artwork for machining. Howard Bros were able to select from a database of over 300 machine tools, as well as selecting any customised tools that they may have added to the database.
ArtCAM Pro comes with a range of machining toolpath strategies, all of which have been developed with different industries in mind. One of these is the ‘Spiral Machining’ strategy, specifically designed for coin manufacture.
Before sending their toolpaths to their machine, Howard Bros Engravers Ltd, were able to check the accuracy of the machined model by simulating them in the 3D view. This meant that they could alter any calculations prior to machining, saving time and money.

To ensure that Delcam were happy with the result, they sent a rotatable 3D PDF that was created in ArtCAM. After these were approved, toolpaths of both the front design (used to machine one coin die) and the reverse (used for the other) were exported to their machine.
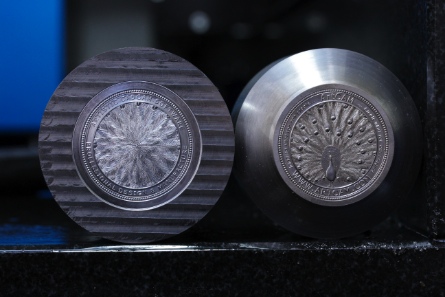
And this is how the finished dies looked …
… and the result was that coin.
Here you can watch a film about creating that coin on YouTube.
More about Delcam, one of the world’s leading suppliers of advanced CADCAM software product development solutions, is available here.
To learn more about the ArtCAM software product range visit the ArtCAM website.
You can find the new ArtCAM Pro 2012 here.
And this is the website of Howard Bros Engraver.